Recorder Installation & Message Capture Steps
Recorder Installation
LM Tools, provides a recorder component, capable of recording all HTTP / HTTPS / Websocket transactions between browser (Chrome / Firefox) and Web server. This helps to learn all messages (requests / responses) exchanged between browser and web server, hence it helps to configure LM Tools for testing HTTP / HTTPS / Websocket based applications.
Create and sign certificate as a CA
This page describes the steps followed to create own CA certificate, create user certificate and sign it by own CA certificate. Somehow I have not been 100% successful, but looks I am close to get it up and working. Request you review and guide me to get it up and working.
I am using Ubuntu 14.04, 64 bit machine. For certificate generation, I am using certtool provided by gnutls.
Create CA Certificate
- Create cert.cfg template file with below content.organization = "LM Pvt Ltd."
state = "Karnataka"
country = IN
cn = "LM REC CA"
serial = 008
expiration_days = 365
ca
cert_signing_key
crl_signing_key - To create private key for CA, use below command
certtool -p --outfile rec.ca.key.pem
- To create CA certificate, use below command
certtool -s --load-privkey rec.ca.key.pem --template cert.cfg --outfile rec.ca.crt.pem
Set CA Certificate in System Trust List
- Now since CA certificate is generated, lets put this certificate in system trust list. Browsers like Chrome use system wide trusted certificate chain for verification. Execute below commands to set CA certificate in system trust list.cp rec.ca.crt.pem rec.ca.crt.crt
cp rec.ca.crt.crt /usr/share/ca-certificates/extra/
sudo dpkg-reconfigure ca-certificates - Once certificate reconfiguration starts, you will see a screen as below.
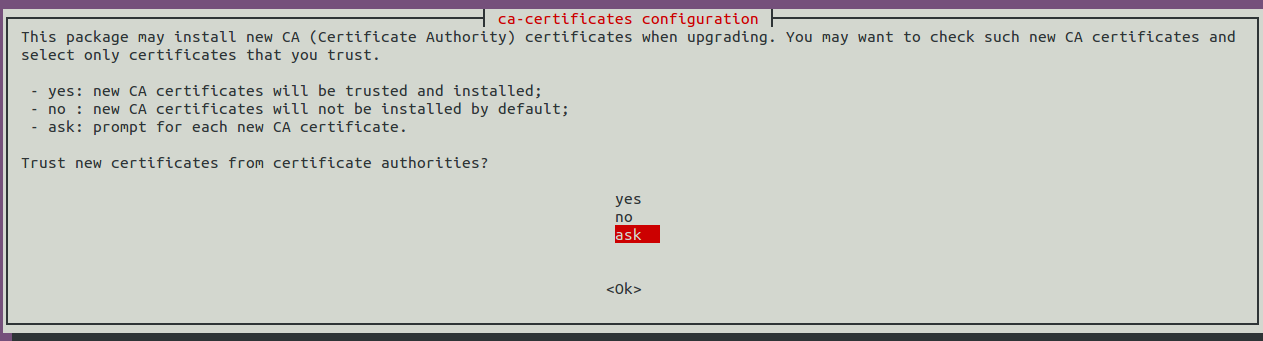
Out of yes / no / ask option, select ask option and press Ok button. - Next you will see below screen, you need to select the certificate (use space bar, once selected you can see * symbol) you would like to install in trust list.
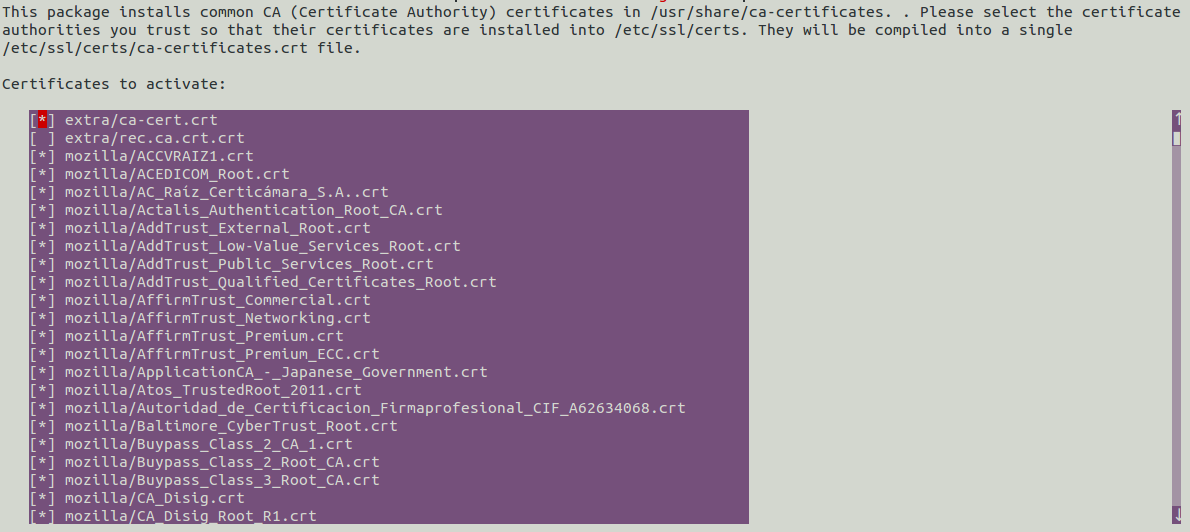
Select right CA certificate. The screen looks as below, see the second line, highlighted portion, that's the CA certificate selected.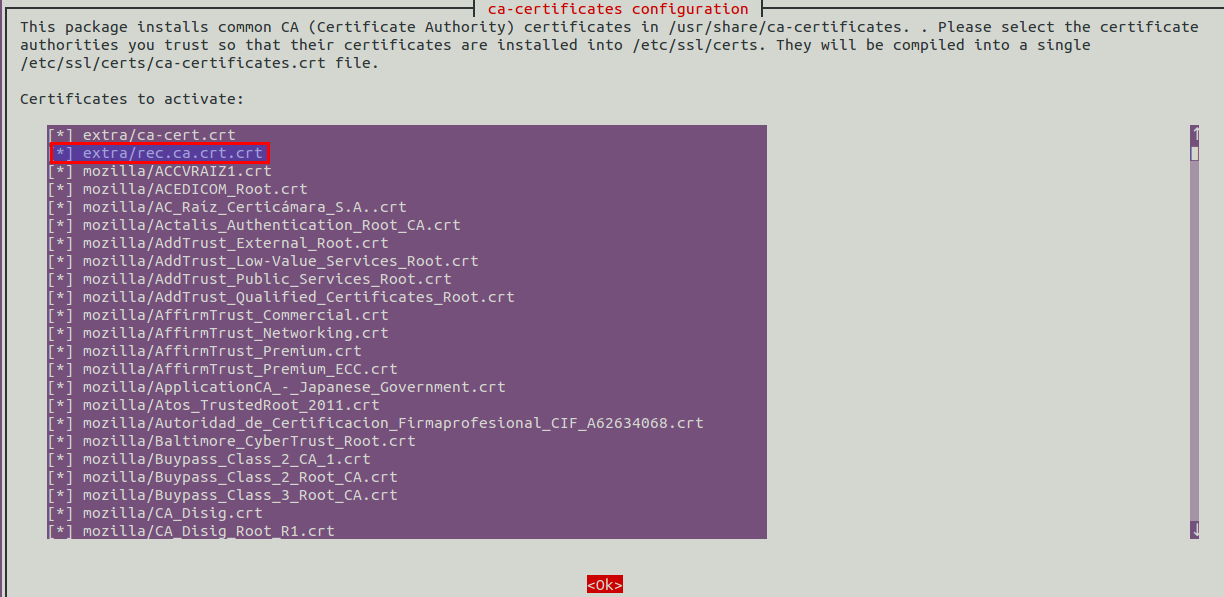
Next confirm the operation by pressing Ok button. - Once you confirm the operation, it may take several seconds to install certificates in trust list (in fact it may add / remove other certificates as well). After reconfiguration done, terminal content looks as below.
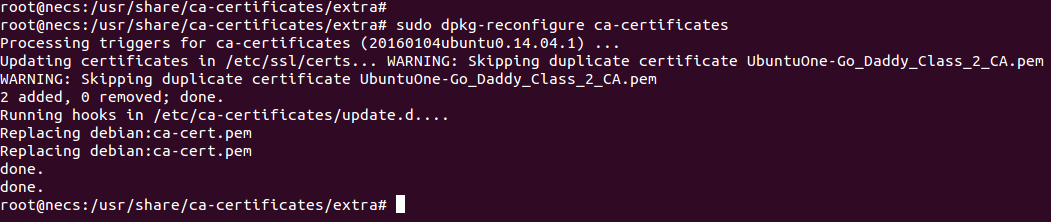
With this, the CA certificate is set in system trust list. Ideally using this CA certificate if you sign other certificates, Chrome should trust that signed certificate.
Create Server Certificate
- Create cert.cfg template file with below content. Please note that it is different than cert.cfg used to create CA certificate.organization = "LM Pvt Ltd."
state = "Karnataka"
country = "IN"
cn = "LM REC CA"
serial = 009
expiration_days = 365
dns_name = "lmtools.com"
tls_www_server
encryption_key - To create private key for server, use below command
certtool -p --outfile key.pem
- To create server certificate, and sign with CA, use below command
certtool -c --load-privkey key.pem --load-ca-privkey rec.ca.key.pem --load-ca-certificate rec.ca.crt.pem --template cert.cfg --outfile cert.pem
That's all. Now server certificate is ready.
Create Localhost Certificate
It is important to create local host certificate. With latest LM (since LM 4.02 rc7), recorder listens at a configured port to track user events (click, type etc). For this user event communication. browser and recorder use wss (secured websocket). In this case local host certificate is used else browser complains "common name error in certiificate". To generate localhost certificate please follow below steps.
- Create cert.cfg with below content
organization = "LM Pvt Ltd."
state = "Karnataka"
country = "IN"
cn = "localhost"
serial = 010
expiration_days = 365
dns_name = "localhost"
tls_www_server
encryption_key
- To create private key for localhost server, use below command
certtool -p --outfile localhost.key.pem- To create localhost server certificate, and sign with CA, use below command
certtool -c --load-privkey localhost.key.pem --load-ca-privkey rec.ca.key.pem --load-ca-certificate rec.ca.crt.pem --template cert.cfg --outfile localhost.cert.pem - To create private key for localhost server, use below command
rec.ca.key.pem
rec.ca.crt.pem
rec.ca.crt.crt
key.pem
cert.pem
cert.cfg
localhost.key.pem
localhost.cert.pem
serial.txt
rec.ca.crt.pem
rec.ca.crt.crt
key.pem
cert.pem
cert.cfg
localhost.key.pem
localhost.cert.pem
serial.txt
Configuring Browser
Now you need to configure browser for proxy settings. In this case, proxy is nothing but recorder. Please check here for more details.
Message Capturing
Now you browse any site, you will see in current path (from where you are executing recorder), a template folder is created. The files like msg_tx_n and msg_rx_n are the captured messages.
Trouble Shooting
Sometime it is observed that browser does not show the images properly. This is the default strict behavior from browsers. When browser does not believe certificates, this results image to be not shown in page properly. Nothing to worry. This can be corrected, please refer below steps.
Trouble Shooting - Firefox
The recorder root CA certificate is present in path where from you execute recorder. You need to import recorder root CA certificate to Firefox. Refer below steps to import root CA certificate to Firefox.
- Click Open Menu button in Firefox (triple line button, stacked vertically) in Firefox extreme right corner. The menu GUI looks as below.
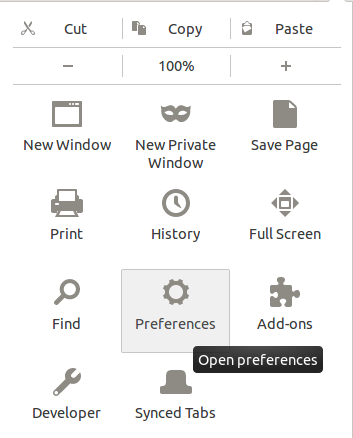
- Click on Preferences. You will see GUI as below. Please note that Certificates tab is selected.
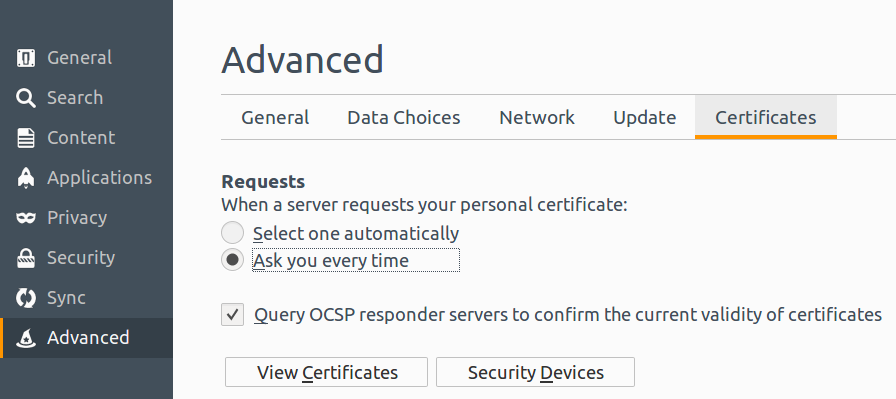
- Click on View Certificates button. You will see certificate manager as shown below.
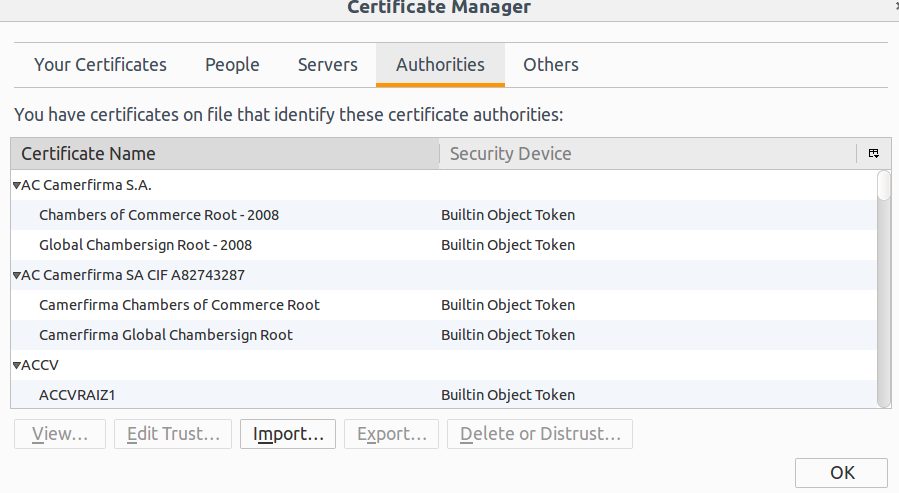
Select Authorities tab. And click on Import button. A file open dialog appears, browse to directory from where you are executing recorder. Select the ca certificate file (.pem) and import it. If import initiates properly, you will see below GUI. If nothing pops up, probably you did not select the right ca certificate file, in that case try to import again.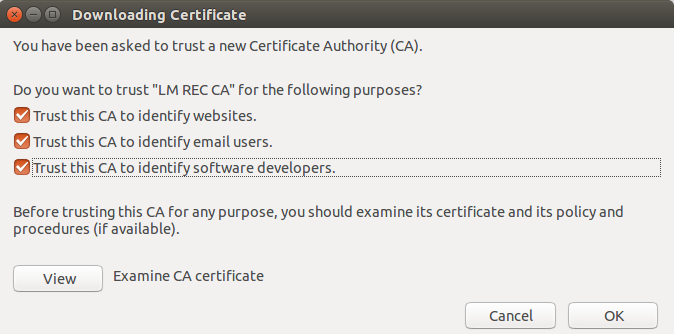
- Select all the check boxes and hit Ok. With this root CA certificate import is done.
Trouble Shooting - Chrome
The recorder root CA certificate is present in path where from you execute recorder. You need to import recorder root CA certificate to Chrome. Refer below steps to import root CA certificate to Chrome.
- Click on Customize button in Chrome (triple dot stacked vertically) at right upper corner. You will see menu GUI as below.
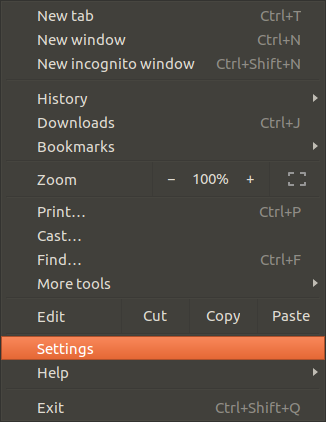
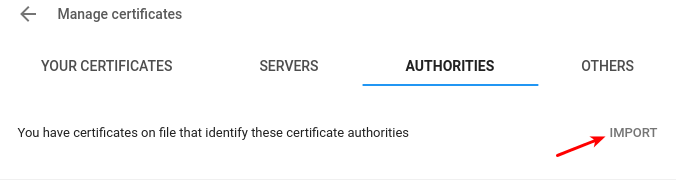
- Click on settings in menu GUI. You will see settings page. Scroll down till end, and click Advanced link. Locate Manage certificates section. Click on right arrow small button shown right. You will see below GUI. Please note that AUTHORITIES tab is selected.

- Click on IMPORT button as shown in below image.
A file open dialog pops up. Browse to directory where from you execute recorder. Select the root CA certificate file (.pem). You will see below certificate authority dialog.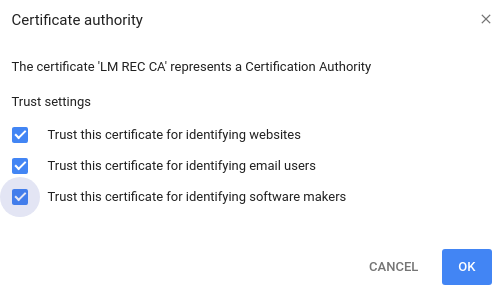
- Now select all three check boxes, and hit OK button.
WebRTC Load Testing
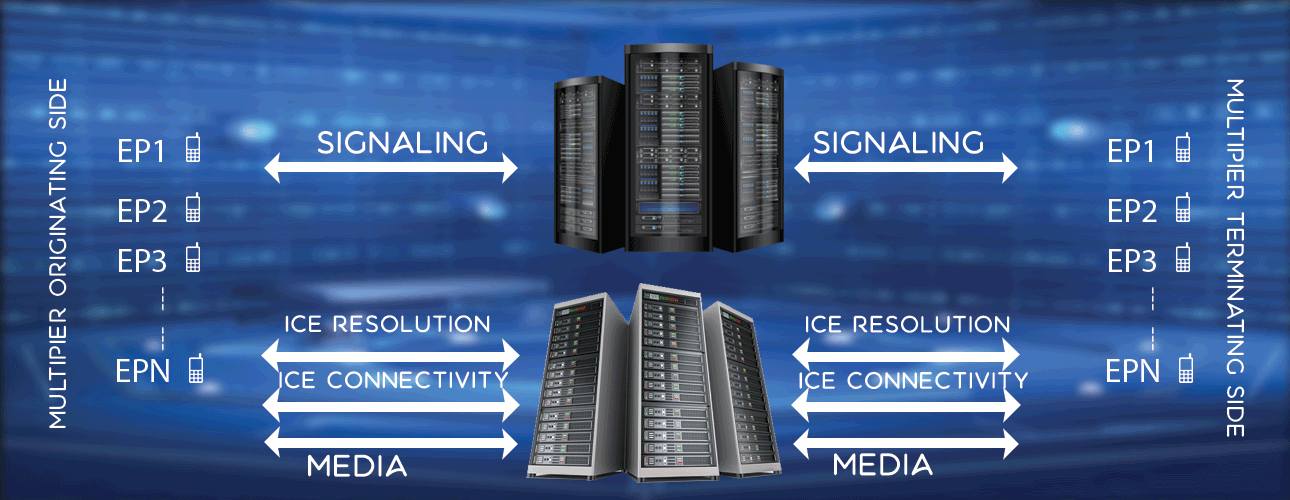
Features
Signalling SIP, IMS, JSON, HTTP
Media PCMA, PCMU, AMR, OPUS, VP8
Security TLS, SRTP/DTLS, Websocket
Features , Syntax , Example
Performance, Capability
Machine Desktop 2.4 GHz, 8 GB RAM
Memory/Endpoint 12Kb
Rating 1 100,000 endpoints, 15 CPS, 15 sec call
Rating 2 3600 endpoints, 120 CPS, 15 sec call
Cost, Packages
Check cost, packages here.